

Where to configure
Open Settings and click the Status Notifications sub-tab.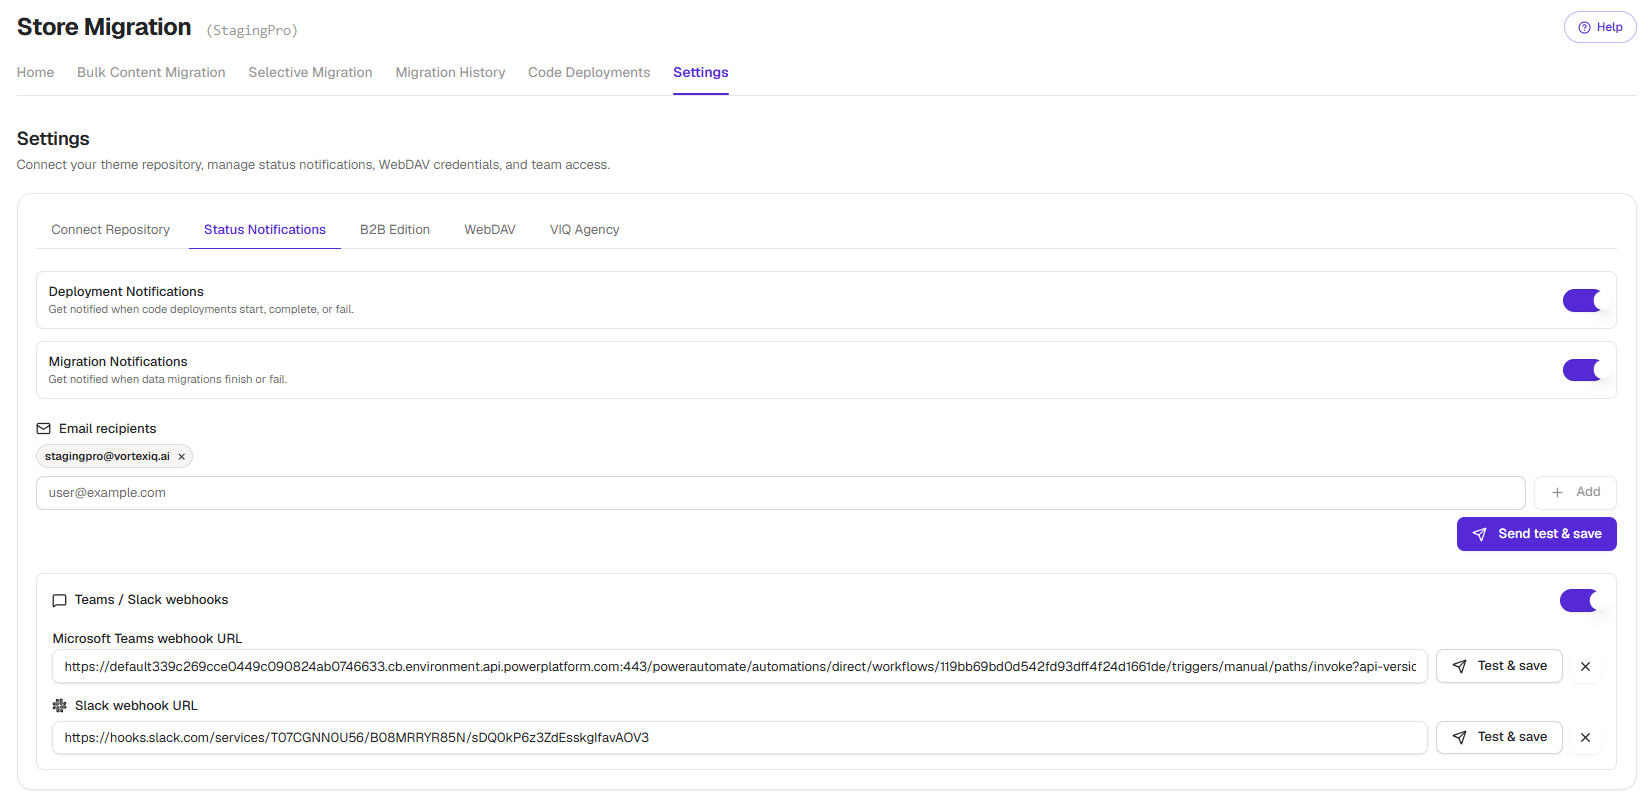
- Deployment Notifications, alerts on theme deployments (start, complete, fail, rollback).
- Data Migration Notifications, alerts on bulk and selective migrations.
Email notifications
Email is the simplest path. No webhook configuration needed.- Open Settings, Status Notifications.
- Enter an email address in the Email Notification field.
- Click the +Add button to add it. The address appears as a chip; you can add multiple addresses by repeating.
- Tick Deployment Notifications, Data Migration Notifications, or both.
- Click Send Test Email & Save to verify routing and persist the configuration.
Slack notifications
Slack uses an Incoming Webhook for delivery. Three steps: create the channel in Slack, create the Slack app and webhook, paste the webhook into StagingPro.Step 1, set up the Slack channel
- In Slack, click the ”…” next to Channels in the sidebar.
- Choose Create a channel.
- Give the channel a unique name and click Create.
- Add channel members. If everyone in your workspace should see StagingPro alerts, leave the default; otherwise add specific users.
- The channel appears in your sidebar.
Step 2, create the Slack app and incoming webhook
- Open api.slack.com in a new tab.
- Click Create an app.
- Select From scratch.
- Give the app a name and pick your workspace from the dropdown.
If the workspace dropdown is empty, you are not signed in to that workspace; sign in to Slack and reload api.slack.com.
- Click Create App.
- Under Add features and functionality, choose Incoming Webhooks and click Save Changes.
- Confirm the Activate Incoming Webhooks toggle is On, then click Add New Webhook to Workspace.
- Slack asks permission to access your workspace. Pick the channel you created in Step 1 and click Allow.
- The webhook URL is generated. Click Copy and keep it on the clipboard.
Step 3, connect the webhook to StagingPro
- Open Settings, Status Notifications in StagingPro.
- Click Add Channel and select the Slack icon.
- Paste the Slack webhook URL into the Slack channel text box.
- Click Send Test Message & Save, type a test message, and click Send.
- Switch to your Slack channel and confirm the test message arrived.
Microsoft Teams notifications
Teams uses a Workflow webhook (the modern approach, replacing the older Incoming Webhook connector). Three steps: create the Team and channel, create the Workflow, paste the webhook URL into StagingPro.Step 1, create the Team
If you do not already have a Team in Microsoft Teams:- Open Microsoft Teams. Click Teams in the sidebar.
- Click Create Team.
- Give the team a unique name and click Next.
- Add team members by name or email.
Step 2, create the channel
- Hover over your Team name and click the ”…” that appears.
- Click Add Channel and give the channel a unique name.
Step 3, create the Workflow webhook
- Hover over the channel name until ”…” appears, click it.
- Click Workflows.
- Choose Post to a channel when a webhook request is received.
- Name the workflow and click Next.
- Click Add workflow.
- Copy the unique workflow URL shown in the dialog. Click Done.
Step 4, connect to StagingPro
- Open Settings, Status Notifications in StagingPro.
- Click Add Channels and select the Microsoft Teams icon.
- Paste the Workflow URL into the Teams Channel field.
- Click Test & Save.
- Type a test message and click Send.
- Switch back to the Teams channel and confirm the test message appeared.